Beezid
Showing posts with label Windows-8. Show all posts

Monday, July 27, 2015

How-To do Windows Updates for Windows 8.1

Be the first to comment! Posted by Hannah on 8:35 PM

Today’s How-To Guide for the computer beginner we are going attempt answer the question, ‘How-To do Windows Update for Windows 8.1?”


If you have Windows 8 there is an update to Windows 8.1.  Please check the Microsoft page to see if you are eligible! 


Today I will briefly explain:

Where is Windows Update? 

How do you install the Window’s updates? 

What are optional updates?

Turning on Automatic updates


Where is Windows Update?

In Windows 8:

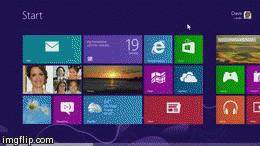
You want to click or swipe on the right hand side of your screen to bring your charms bar UP!

Charms menu


At the very top you will see the ‘search’ option, and you need to click on that.    Then type “Windows Update”  Then select it.

search


OR You can also search under the ‘settings’ option.  Then you start typing, “Windows Update” !

5-wu


Click on Windows update, and the Windows Update box will open.

Some people choose to go directly to the PC Settings, and then to ‘update and recovery” like the picture below

(I personally just click search, and type in windows update)

pc settings

8 windows up

Click the ‘check now’ to find the most up to date list available.

This may run for a while, unless you have been updating all long.

8 update

(Keep in mind below I will be using some windows 7 pictures for this lesson, because the screens are very similar in Windows 8)

When its complete you will get a similar looking message about the different updates YOUR computer will need!  The important section is similar to what we see below:


windows update_thumb[18]

Notice it says 14 important updates and 37 optional ones.  That is the blue letters on the left hand side of my picture above.

With Time majority of the ‘important’ ones are done automatically by windows 8.1 when you enable your computer to do that.  We will show you that later on! 


How-To install the Window’s updates 


Then you have the button on the right  that states “install updates”. 


windows update 4


Now when you click that button your computer will attempt to download, and then install those updates that Microsoft stated your computer needs. 

It will take a while for the updates to first download, and then install.  If your files are small?  It will be much quicker!

Be patient!

Once the process is complete your computer may ask you to restart the computer to finish the installation.


windows-update 5

When you restart you may see something similar to the below picture, because Windows 8 is completing its installation!


config


Keep in mind some updates need to be done by themselves, and other updates can be grouped together to install properly. 

Don’t ask me why, but windows update doesn’t always tell you that.  You will sometimes notice the computer telling you it only updated 3 out of the 14 updates.  Then asks you to ‘restart computer’.  That normally gives me the first clue that they needed to be installed separately.

Go ahead and allow the computer to restart.  The computer should restart on its own, but allow time for this.  It maybe slower to shut down and restart than your used too.

Once the computer is restarted?  Please do the above steps again for windows update, and install the remaining ones that are needed. 


Working with Optional Updates

Once you have the IMPORTANT updates done you move on the optional updates.   In the below picture you should see ‘Show All Available Updates” in blue letters.  You click on that!

8 update 2

Some of the optional updates you may recognize the program (like your printer for example) , and below I’m showing an update for Skype.   You make sure the box has the checkmark in it if you want the update, and you click install in the bottom right hand part of the picture below. 

8 update 3


I don’t use that program, and I’m sure Dell loaded on my machine when I bought it.  I left that ‘optional’ update unchecked.  You notice the ‘install’ area is greyed out, because I didn’t select this optional update.

I would say majority of the time you won’t recognize what the updates are for, and you can either google them…or install them.  It’s up to you, and that’s why they are called ‘optional’.

Again, you want to continue to do the windows update until FINALLY you have completed all of them!

When you have done all your windows updates, and optional updates you will get the below message! 

YEAH!  Your done!


windows update 8

Turning on Automatic updates

Majority of time people like to turn on automatic update notifications for  Windows Update

Let’s go back to the charm bar!  Then click on settings!


charm 2


Notice at the VERY bottom you will see, “Change PC settings”.  Click there.

optional 1

At the very bottom click update and recovery.

optional 2


On the right in red letters click:  Choose how updates get installed

automatic

At the top you have a pull down menu, and two places that you can select WHAT you wish! 

automatic 2

Depending on your comfort level in this area you choose which is better for you.  Most go with the recommended option!

What is nice about updates compared to past operating systems (in my opinion) is updates are done behind the scenes, and I don’t even know its working.  I still do windows updates regularly, and check for optional updates out of habit. 

With Windows 8 you may also get a similar as below, but it will state that they already installed your updates.  They will ask you to restart the computer.

updates

(Notice the icon at the bottom!)

Keep in mind computers are machines, and if you haven’t see the reminder in a while?  Do your windows update manually once again like I have shown you, and keep it UP TO DATE!

You will notice when you go to shut down your computer updates were done behind the scenes, and they ask you WHEN they can install them. 

If something is not clear, or you feel something should be added to our lesson? Please feel free to leave your comment or question in section we provided.


Also please subscribe by leaving your email in the box supplied, and you will received future lessons by email as they come out.


Thank you for reading our How-To Guide for the Computer Beginner, and today’s lesson on “How-To do Windows Update for Windows 8.1?”

Saturday, September 28, 2013

What is the Windows Lock Screen?

Be the first to comment! Posted by Hannah on 2:38 PM

Today’s How-To Guide for the computer beginner  handles the question:

What is the Windows Lock Screen?

In the past if you have a password you had to enter into your computer before it would completely boot up?  You saw a screen similar to the one below.  I have heard this referred to as the ‘sign on screen’.

As you can see below on a Windows 7 Machine?  A gentleman named “Paul” will have to enter his password to get into his account on this computer.
Windows 7 Sign on Screen
Windows 8 starts with a lock screen similar to the one below.  When you tap, double click, or hit a key on the board….
windows 8 lock screen
You will get a similar screen to Paul’s sign in screen we pictured first.

As you can tell with Windows 8 lock screen it gives you the most basic of information.  The time and the date are regular’s to show up! 

Depending your machine widgets, known as lock screen apps, they will allow you to view information – such as new emails, weather, calendar appointments, instant messages or social updates – without even unlocking your PC.  If you have  laptop?  It could show you how much battery life you have left.

If something is not clear, or you feel something should be added to our lesson? Please feel free to leave your comment or question in section we provided.


Also please subscribe by leaving your email in the box supplied, and you will received future lessons by email as they come out.

Thank you for reading our How-To Guide for the Computer Beginner, and today Explanation on What is the Windows Lock Screen.

How-To Run Disk Cleanup in Windows 8

Be the first to comment! Posted by Hannah on 1:19 PM

Today’s How-To Guide for the computer beginner is going to over Disk Cleanup in Windows 8.

When you run this option Disk Cleanup you also are given an option to clear the Cache (Temporary internet files).

How-To Clean up with Disk Cleanup is an older article that explains what Disk Clean up is, and explains other details about this application.  The definitions are the same even though it speaks about older operating systems.

First we want to go to the Charms Bar on your start screen, and use the ‘Search’ Charm or option.
Windows have an ‘app’ or program now called, ‘cleanmgr’. 

Type in ‘clearnmgr’ (program name for disk cleanup) on the right side side under the search option pictured below.

On the left hand side of the screen under ‘apps’ you will see the program icon come up.  You click or tap that icon to open up the program ‘disk cleanup’ for Windows 8.
Cleanmgr Disk Cleanup Windows 8

The disk clean up screen for Windows 8 will open up, and you will have a pull down menu to pick the computer drive you want to ‘clean up’.
disk cleanup windows 8
Once you have picked the drive you want to clean up, you click OK.  The familiar options screen pops up to allow you to make choices as we have done in the past with other operating systems (Windows 7, Vista, XP, etc).
Disk-Cleanup Options Windows 8
If you click on the options a description box opens up below, and describes what it will delete or clean up.  In the above picture I have highlighted ‘Downloaded Program Files”.  If you look below that section you will see a description field.

Make sure you click (or tap) which fields you have chosen to clean up, and they will have a check mark in the box.  The ones left with NO check mark it will NOT delete or clean up.

Click or Tap “OK” and allow the computer to run the app or program.

That’s IT!  Your done!

If something is not clear, or you feel something should be added to our lesson? Please feel free to leave your comment or question in section we provided.


Also please subscribe by leaving your email in the box supplied, and you will received future lessons by email as they come out.

Thank you for reading our How-To Guide for the Computer Beginner on Disk Cleanup for Windows 8.

Wednesday, September 25, 2013

What is the Windows Key or Button? What are the Windows 8 Hotkeys or Shortcuts?

Be the first to comment! Posted by Hannah on 12:10 PM

Today’s How-To Guide for the computer beginner is Called, “What is the Windows Key or Button?  What are the Windows 8 Hotkeys or Shortcuts?”

I also have a Hotkeys or Shortcut Cheat Sheet at the bottom to print out if you so wish.

What is the Windows Key or Window Button?


I have also heard this key being referred to as:
Windows Button
Windows Logo Key

They are the same thing – just different nicknames!

We will also go over Windows 8 Shortcuts using this button.  These shortcuts are also referred to as:

Windows 8 Shortcuts, or Windows 8 Shortcut Keys
Windows 8 Hot keys
Win8 Shortcuts

Again, same thing just a different label!

In Windows 8 in particular you will be using this key to navigate around your computer.  You will be using the windows key quite a lot!

Notice is has the logo most people identify for Windows Operating System Products.

Windows Key Window Button
Above is a picture of the windows Key, or Windows Button.

When you wish to return to the Start Screen you will push this windows key for example.  That would be called a ‘shortcut’.  Some refer to it as a keyboard shortcut, but again same thing different label.

What are the Windows 8 Hotkeys or Shortcuts?


Below are some examples of Window Key Shortcuts, but keep in mind most of the time people will reference how to use them.  Most people are NOT expecting you to know all of them – all the time!

The Strange looking graphic looks your Windows key pictured above.

The direction below are asking you to do two things.  First you want to hold down the Windows logo key that we have been talking about. 

Notice is also states +C.  This means to also push down the C key at the same time.

Its okay to push the Windows Logo key, and then hold it down to find the second key to push.  Just remember BOTH need to be held down at the same time for the result you are looking for.
Windows logo key Windows logo key +C
Open the Charms
Windows logo key Windows logo key +D
Display and hide the desktop
Windows logo key Windows logo key +F
Open the Search charm and search for files
Windows logo key Windows logo key
Display or hide the Start screen
If you would like to see a more complete list of Window Logo Key Shortcuts?  Microsoft has a very extensive list for you. 

Microsoft Windows 8 Logo Key Shortcut list

If you would like a print sheet of these Windows 8 hotkeys, or Windows 8 Shortcuts I uploaded them here for you to print.
Win8 Shortcuts – Printable Cheat Sheet

If something is not clear, or you feel something should be added to our lesson? Please feel free to leave your comment or question in section we provided.


Also please subscribe by leaving your email in the box supplied, and you will received future lessons by email as they come out.

Thank you for reading our How-To Guide for the Computer Beginner
On: What is the Windows Key or Button? What are the Windows 8 Hotkeys or Shortcuts?

Tuesday, September 24, 2013

Where is the Start Menu for Windows 8?

Be the first to comment! Posted by Hannah on 8:43 PM

Today’s How-To Guide for the computer beginner is about the Start menu for Windows 8.

We will be covering very briefly:

Where is the Start Menu in Windows 8
What is an App
What Is The Charms Bar, and the Charms themselves.
(I have animations at the very bottom on how to get the charms bar to appear using the mouse and touchscreen.)Windows Start Menu

Where is the start menu for Windows 8?

Here is a picture of a traditional start menu.

Well Microsoft wants to change things UP a bit now.

Microsoft no longer has what we have called in the past a ‘start menu’, but now they have what they called a start screen

They have basically moved the entire start menu onto what was once the traditional spot for our desktop

That is NOT to say that Windows no longer has a traditional desktop anymore.  THEY DO! 
We will get to that later, but lets move on….

Windows_8_Start_Screen_Start_MenuHere I have a picture of the start screen, but keep in mind your start screen may look a bit different.

Microsoft states it has expanded the Start menu, turning it into a full-screen launching pad for your programs.  

It seems what they are trying to do is combine a tablet type of device with the traditional computer. 

Most will say if you are going to get a computer with Windows 8 today a ‘touchscreen’ is a must.  That is NOT to say you can’t use a regular mouse as we have in the past.  Tablets are touchscreen, and instead of clicking as we normally would – we touch!

What is an APP?

Another NEW term they are using today instead of programs is APPS.

I honestly don’t see the big difference between what they call a ‘app’ and a program myself.  Windows 8 does have apps that can only be used on a Windows 8 machine.  That seems to be the only difference between the two.  If it is only for a Windows 8 machine?  They call it an app.

Another important NOTE is if your program runs on Windows 7?  It will still run on Windows 8.  So you don’t have to go out, and buy all NEW software!  That is a GOOD thing yes?!

If you have a fancy phone with ‘apps’ on it?  Windows 8 is the same principal.  You can go to the Windows 8 store, and buy apps (or programs) for your new computer.  In time no doubt there will all kinds of different apps, and YES even for free!

The manufacturer of your computer basically picked the programs, or what they called APPS onto your start screen presently.  That doesn’t mean you have to keep them, or you can’t change the appearance of your start screen to programs you would rather use.

What confused my teenagers is that they didn’t know where the rest of their programs – or apps – were. 

Since you no longer have a start button, or a option to click for ‘all programs’ like we did in the past?  What now?

What is the Charms Bar, and what are Charms?

Move your cursor  to the top right side of the screen – or bottom right hand of the screen.  If you have a touch screen?  Glide your finger to this portion of your screen.

You notice when you do this a Charm Bar comes up.  I’m pointing to it below, and placed a red box around it.

Charms menu
Notice you have 5 prominent ones.

Top magnifying glass is the Search Charm.

Second is a Share charm.

Third is the Windows Charm, and brings you back the start screen

Forth is the Device Charm

and Finally the last one is the Settings Charm.

Now if you glide your mouse (or finger) down in the Charms area they turn from almost transparent to a solid form.

Let’s Click on the Search Charm – or tap if you have touch screen.
Search Charm Apps Search

Now you can type in the white box above to search for the program – or app – you maybe looking for.

We will go into more detail at a later date.  I will tell you if you ever want to get back to the start screen again?

Windows 8 Windows key
Look on your keyboard for the Windows Key, and you click it.

We will also be writing more about the Charms menu at a later date, because it maybe one of the MOST important parts of this new operating system called, “Windows 8”.

Just a reminder!  The Start menu is now the Start screen in Windows 8.
Below is a brief video made by Dell Computers, and it gives you a visual on how to do the above if you have touchscreen.
Windows 8 Start Screen for Touch Screen Computers

Here is a animation on how to use the mouse to make the Charms bar Appear.

Here is an animation on how to use your finger and touchscreen to make the Charms Bar Appear.

If something is not clear, or you feel something should be added to our lesson? Please feel free to leave your comment or question in section we provided.


Also please subscribe by leaving your email in the box supplied, and you will received future lessons by email as they come out.

Thank you for reading our How-To Guide for the Computer Beginner lesson today on Where is the Start Menu for Windows 8?  Its call the Start Screen Now.

Tuesday, June 10, 2008

How-To Change Your Mouse Settings

Be the first to comment! Posted by Hannah on 8:23 AM

mouse wheelToday’s How-To Guide for the computer beginner  lesson is how to change your mouse settings.
Why would change your mouse settings?  You could be left handed, and you are more comfortable clicking the opposite way.
Lets say mouse sensitivity drives you nuts, because you can’t double click as fast as the computer wants you too.
You want to change the appearance of your pointer so you can see it better.
Those are just a few examples.
I’m going to break down how to get to the mouse settings on the computer, and then briefing walk you through all the options you have.
Keep in mind some operating systems have all the options we will talk about, and others will not. 

Change Mouse Settings on Windows 8

Swipe in from the right edge of the screen, and then tap Search. (If you're using a mouse, point to the upper-right corner of the screen, move the mouse pointer down, and then click Search.)

In the search box, enter Change how your mouse works, tap or click Settings, and then tap or click Change how your mouse works.

Change Mouse Settings on Windows 7

Open Mouse Properties by clicking the Start button, and then clicking Control Panel. In the search box, type mouse, and then click Mouse.

Change Mouse Settings on Windows Vista

Start button To Control Panel To Hardware and Sound To Mouse.

In the traditional screen on the Control Panel - just look for MOUSE under the options.
All your options should be in Alphabetical order if you are suing classic mode in the control panel.

Change Mouse Settings On Windows XP

Start button to Control Panel to Printers and Other Hardware To Mouse

Change Mouse Settings on Older Operating Systems

In older versions:
Start Button to Settings to Control Panel to Mouse

How-To Change the Mouse Settings on Your Computer

Keep in mind the mouse properties screen will look similar no matter what operating system you are using. 
You should be looking at a screen similar to the one below.    If you look at the top of this menu?  Make sure you are on the

Mouse Properties Buttons Tab


Mouse Properties Button Tab
Button Configuration
Notice the very TOP of this screen is Button Configuration.  As the description mentions if you have trouble ‘right clicking’, and you would rather LEFT click?  You can switch the primary function of the mouse to make it more comfortable for you.
Double Click Speed
Adjust the double click speed on your mouse to either slower or faster.  Some people just can’t double click fast enough, and they can slow that speed down so it is more responsive to their needs.  The opposite is also available.
ClickLock
This function can help with those that have trouble clicking on something, and having to HOLD the mouse key down for any length of time.  To be honest?  This function is better described in a visual manner, and I found this Youtube video that explains – and shows you visually how this option can help you.
Windows Mouse Properties Click Lock
If you made any changes that more fit your needs at this point?  Click apply, and these move to the next tab called Pointers.  Look to the TOP of this properties box for that.

Mouse Properties Pointers Tab

This Pointer section has already selected a Scheme.  If you look below it you will see the customize box, and it will show you what the appearance will look like.
Mouse Properties Pointers Tab
Scheme
Here you can customize your mouse pointer to one you can more easily see, such as larger or higher-visibility pointers, by choosing one of the available schemes. Click on the drop-down box below the 'Scheme' header, or press Tab until the drop-down box is highlighted, then use the mouse or the up and down arrow keys to scroll through the options until you find the scheme you want.
As you scroll through the list, you will see the pictures changing to reflect the scheme that is highlighted at the time. If you have trouble seeing well, try the schemes labeled 'Large', 'Extra Large' and/or 'Inverted'.
When you've highlighted the scheme you want, click the 'OK' button
Below is a screen shot with the different Scheme’s that this computer user had on their machine.
mouse pointer screen
Enable Pointer Shadow
The pointer shadow being turned on puts a faint dark shadow under the mouse pointer arrow, giving it a 3D appearance and making it appear to "float" above other items on the screen.  This shadow also makes it easier to find the pointer on lightly colored websites or programs.
Once again, when you make changes make sure you click apply at the bottom to save your choices.

Mouse Properties Pointer Options


mouse properties pointer options
Motion
The pointer speed is how quickly you want that pointer to zip across your computer screen.  This is personal taste once again.
Enhance Pointer Precision
To make the pointer work more accurately when you're moving the mouse slowly, select the Enhance pointer precision check box.
Snap To
To speed the process of selecting a choice when a dialog box appears, select the Automatically move pointer to the default button in a dialog box check box .
I personally would rather do this myself, but some people do like the control of this option for personal reasons.
Visibility
These three options may or may not be available to you, and once again they are personal preference.  They explanations are pretty much self explanatory.
To make the pointer easier to find when you move it, select the Display pointer trails check box, and then move the slider towards Short or Long to decrease or increase the length of the pointer trail.
To ensure that the pointer doesn't block your view of the text you're typing, select the Hide pointer while typing check box.
To find a misplaced pointer by pressing the CTRL key, select the Show location of pointer when I press the CTRL key check box.
Once again, if you make changes you should click apply at the bottom of the screen.

With some of the older operating systems like pictured below you options maybe more limited. 
Mouse Settings Properties ScreenM

Mouse Properties Wheel Options


mouse wheel
Just to make sure we are clear as to what the ‘Wheel’ is I have pointed to it in this picture.


Mouse Properties Wheel Options
Vertical Scrolling
To set the number of lines the screen will scroll for each notch of mouse wheel movement, under Vertical Scrolling, select The following number of lines at a time, and then enter the number of lines you want to scroll in the box.
To scroll an entire screen of text for each notch of the mouse wheel, under Vertical Scrolling, select One screen at a time.
A Notch you can FEEL a click when you roll your finger on it when it moves.
Horizontal Scrolling
If your mouse has a wheel that supports horizontal scrolling, under Horizontal Scrolling, in the Tilt the wheel to scroll the following number of characters at a time box, enter the number of characters you want to scroll horizontally when you tilt the wheel to the left or right.
Again all of this is personal preference, and if you made some changes make sure you click apply when finished.

Mouse Settings – Hardware

This basically is showing the software, drivers, etc. that the computer uses to operate your mouse.  I would leave that alone!

If something is not clear, or you feel something should be added to our lesson? Please feel free to leave your comment or question in section we provided.


Also please subscribe by leaving your email in the box supplied, and you will received future lessons by email as they come out.

Thank you for reading our How-To Guide for the Computer Beginner lesson Changing your Mouse Settings!
Holiday Gift Guide: Save up to 50% on Christmas Gift Ideas at BarnesandNoble.com. Spend $25 to get FREE Shipping!